Atelier
How to Make Your Own Wreath for the Holidays
BESIDE co-founder Eliane Cadieux provides an introduction to a new, but ancient, seasonal tradition.
Text—Juliette Leblanc et Eliane Cadieux
Photos—Eliane Cadieux
In North America, wreaths evoke family, comfort, and the first snowfall of the season. They decorate our doors, behind which our families (normally) gather to celebrate the end of the year. But this tradition, and its symbolism, go much further back.
Ancient Pagan peoples believed that trees were endowed with spirits. They would gather the branches of conifers for their regenerative powers, to help them survive the winter.
The Romans would give branches of evergreens to their friends and family to wish them health and vitality at the new year. Later, the branches were shaped into wreaths, symbols of joy and victory in the classical era.
Like so many aspects of Pagan culture, wreaths were incorporated into Christianity and its religious celebrations in December. Now largely freed from its original associations, the seasonal wreath has become a more-than-welcome visual feature amid the grey of the end of the year.

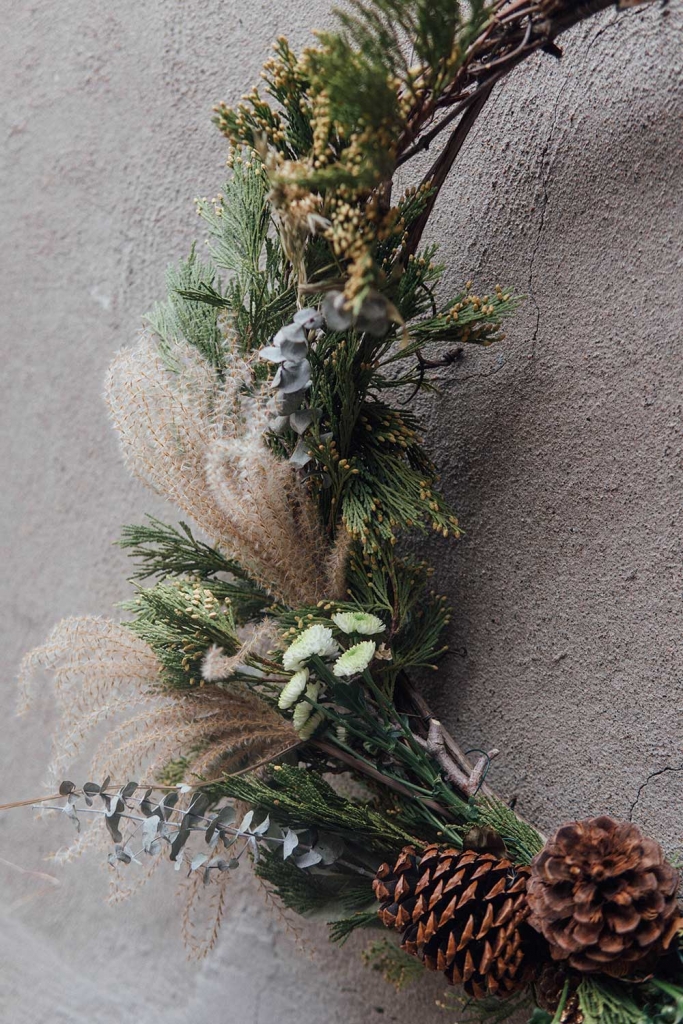
Many florists now offer local, eco-responsible, and inexpensive creations — but did you know that you can make your own? After taking a workshop at the Origine Fleurs flower farm a few years ago, Eliane Cadieux — BESIDE’s creative director and co-founder — embarked on a new tradition: every year, she makes her own wreath for the holidays. Here, she explains what you’ll need to create your own seasonal ornament and how to do it yourself.


Gathering plant material for a wreath is an excellent excuse to take a long walk in your neighbourhood park — or a more ambitious hike in the woods, for more outdoorsy types.
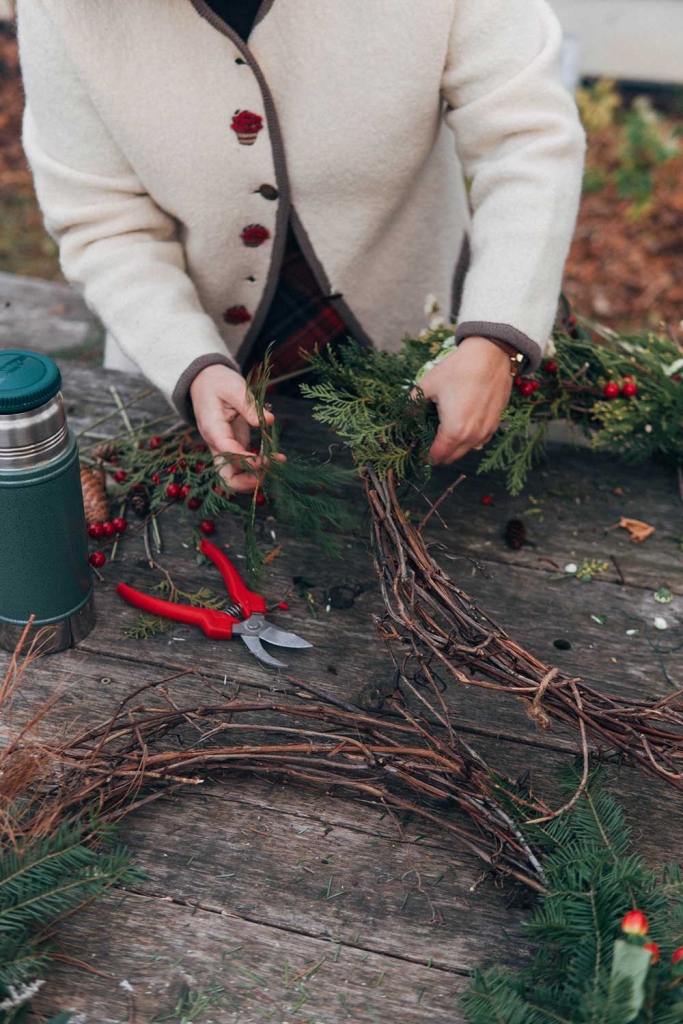
On balmier winter days — that is, not during a snowstorm — dress warmly and set up a workspace outside to make your wreath. On colder days, clear a space on your kitchen table or living room floor. Either way, add a Thermos of tea, hot chocolate, or mulled wine to your list of equipment!
***
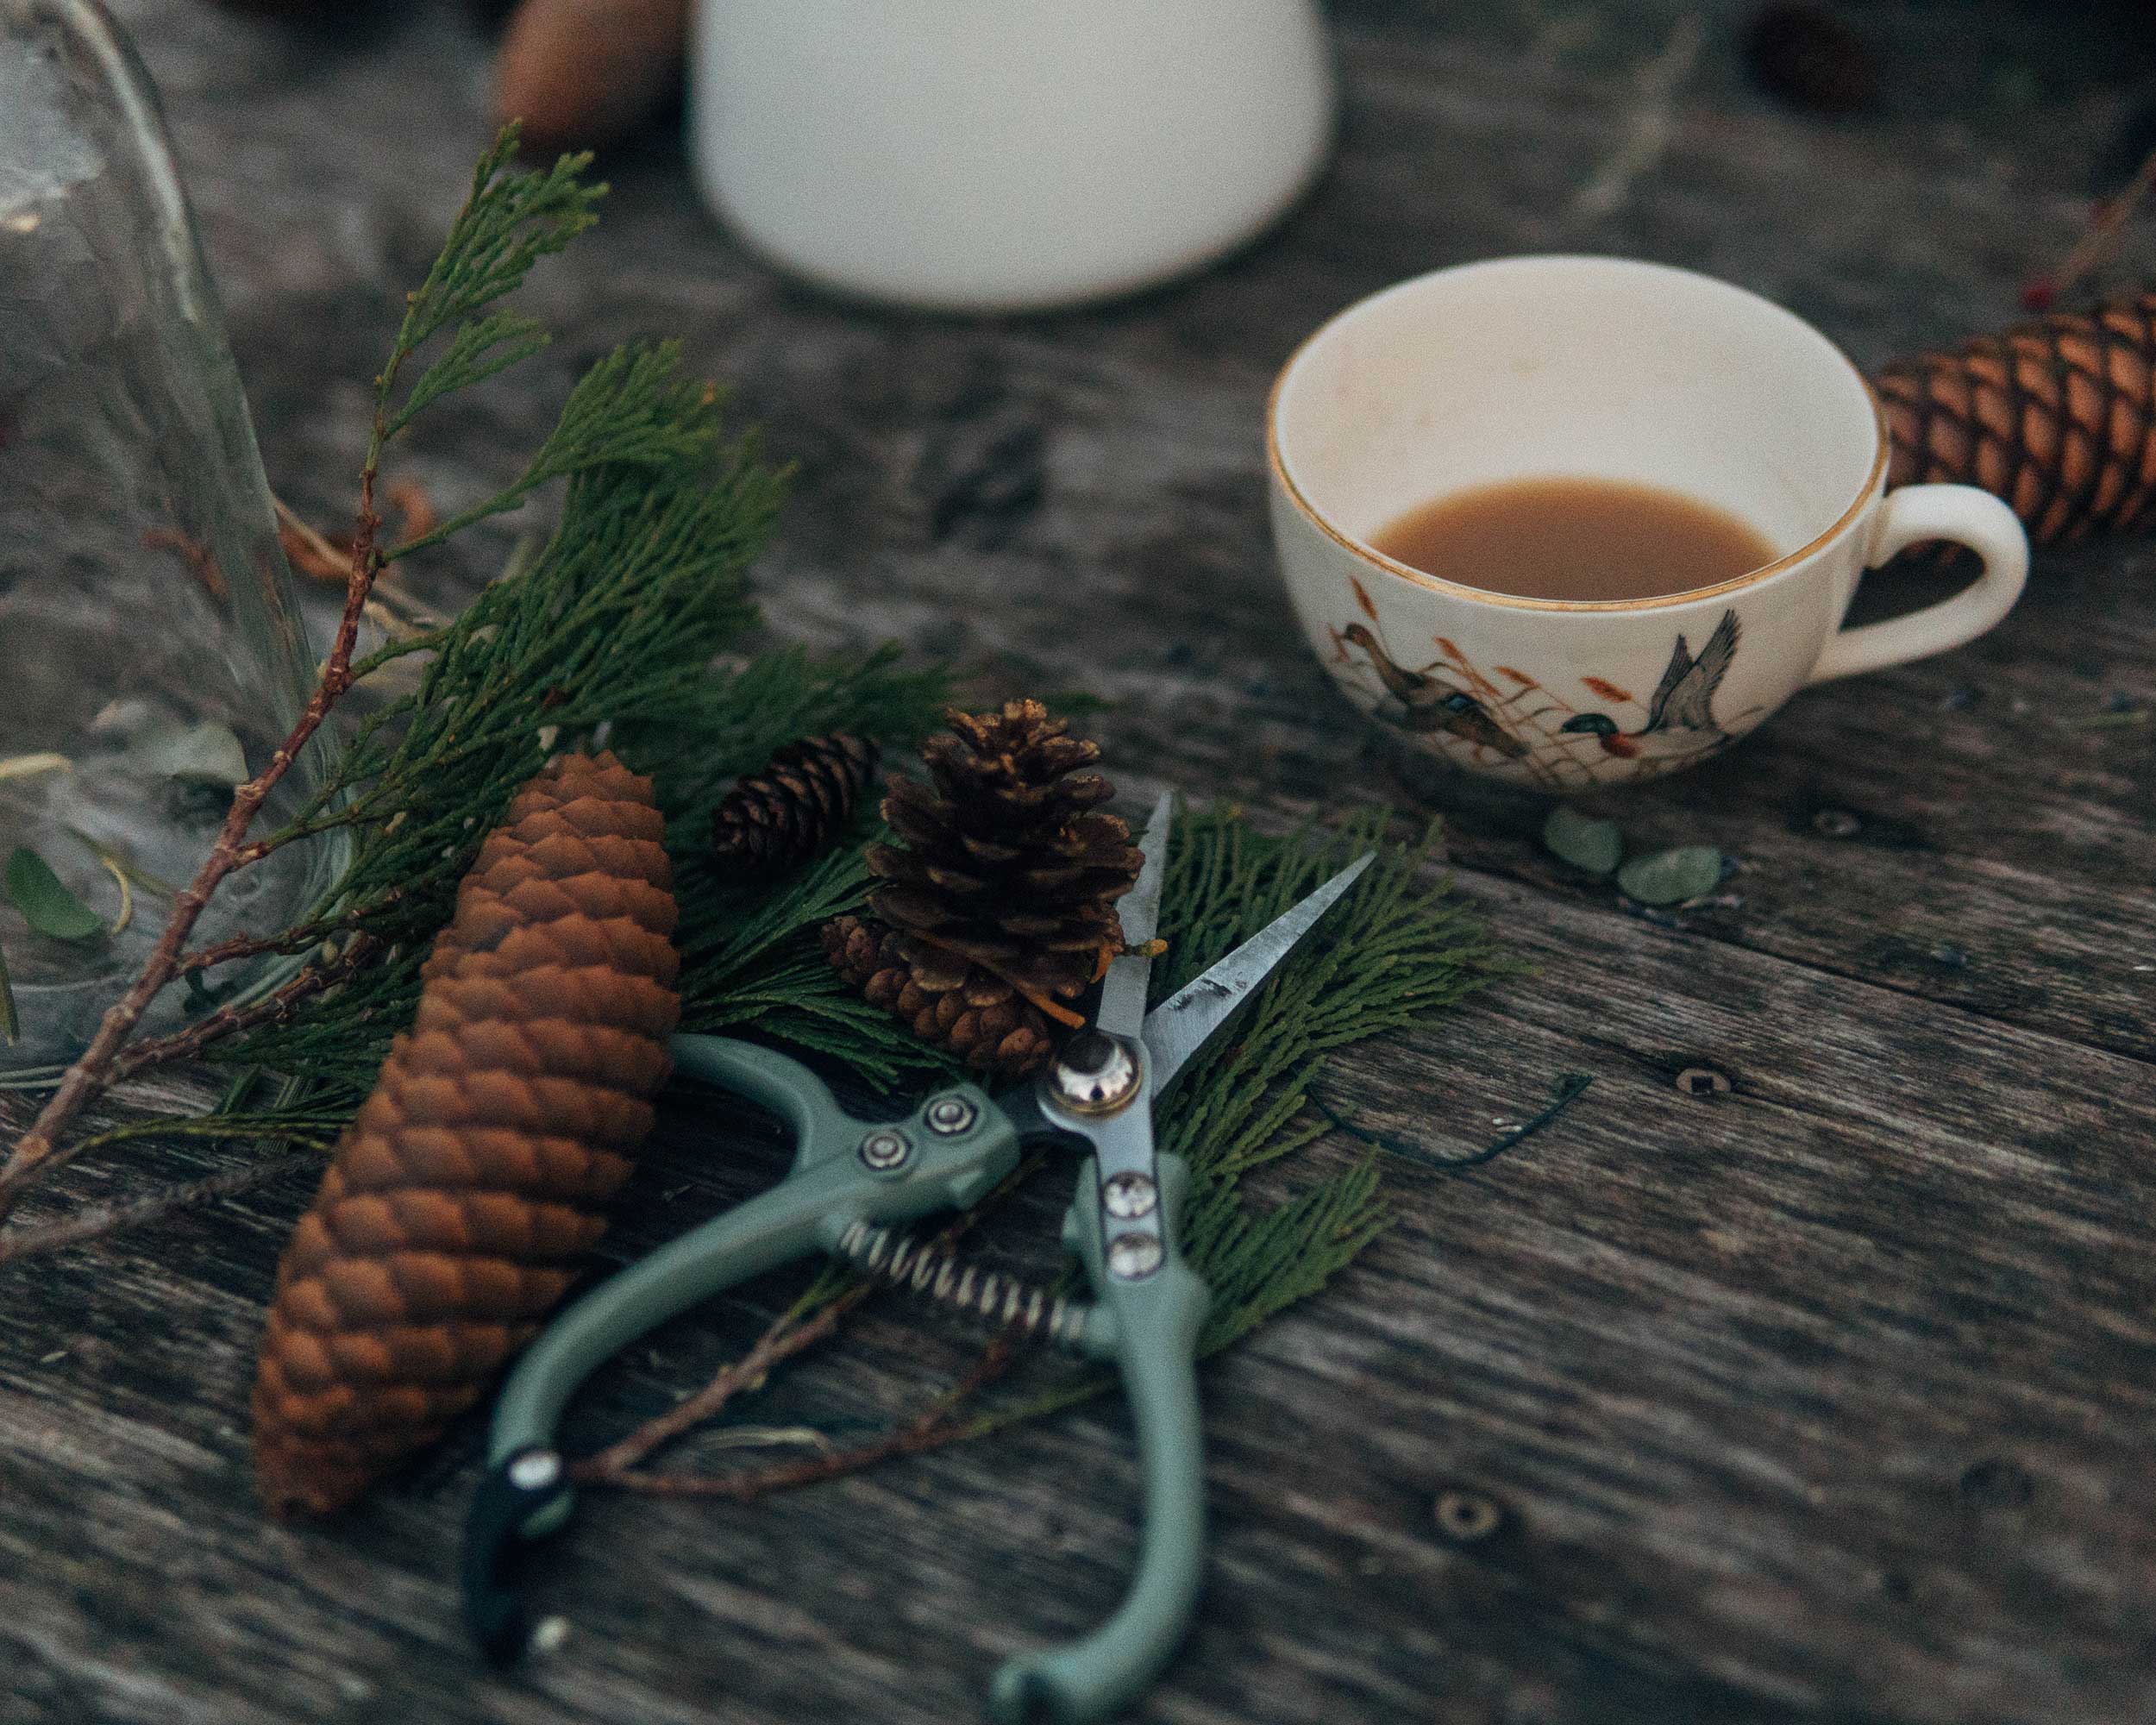
What You’ll Need
_____
- Thin, flexible birch or willow branches, or vine stems, to form the base
Florists often offer ready-made bases. - Wire
This will be hidden in the final product. - Twine, straight pins, or hot glue
- Pruning shears or scissors
- A wire cutter
Important so that you don’t damage your shears or scissors. - Coniferous tree branches gathered from the ground
Ideally not picked off your neighbour’s cedar hedge! - Fir, larch, spruce, or pine cones
Yes, we tend to call them all “pine cones,” but many beautiful cones come from other conifers! - Branches in a variety of colours and lengths, gathered from the ground on a hike
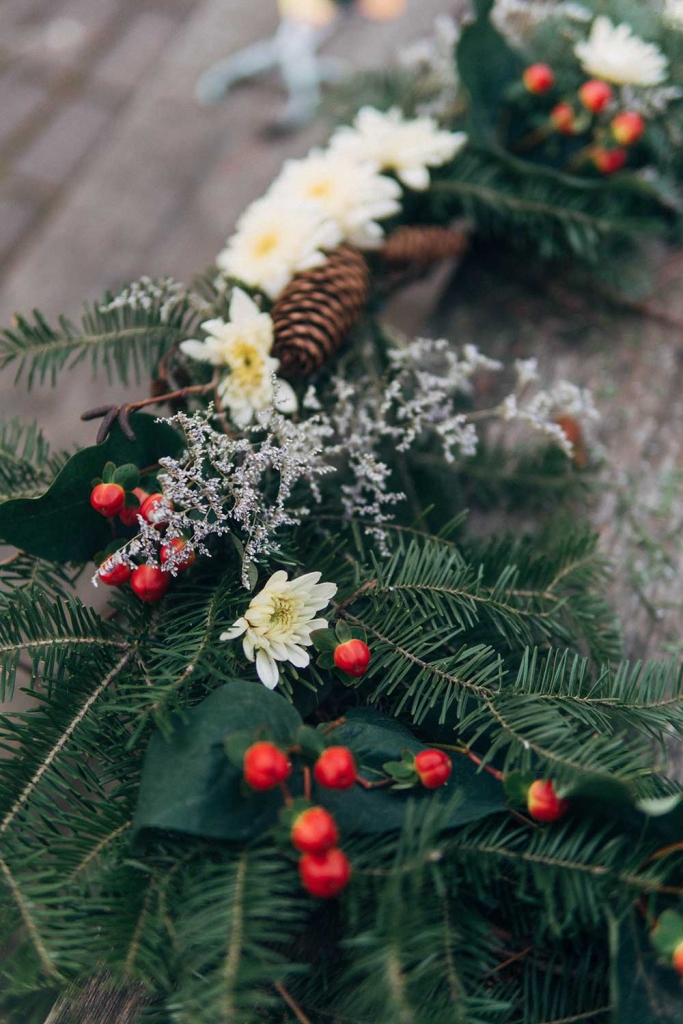
- Dried flowers
Eliane keeps her bouquets and dries them throughout the year. - Fresh flowers from your local florist
- Decorations such as dried berries
- Clear fishing line, natural rope, or a ribbon for hanging
– Pro tip –
Marc Sardi, a floral designer based in Montréal, offers wreath-making workshops. “There’s no rule regarding the choice of dried or fresh plant materials,” he explains. “However, fresh conifers will last a lot longer outdoors, while dried plants will do better indoors, where they’re less likely to be damaged by the elements. You could opt for a wreath made of dried materials for an indoor wall and a wreath of fresh evergreens for your door.”
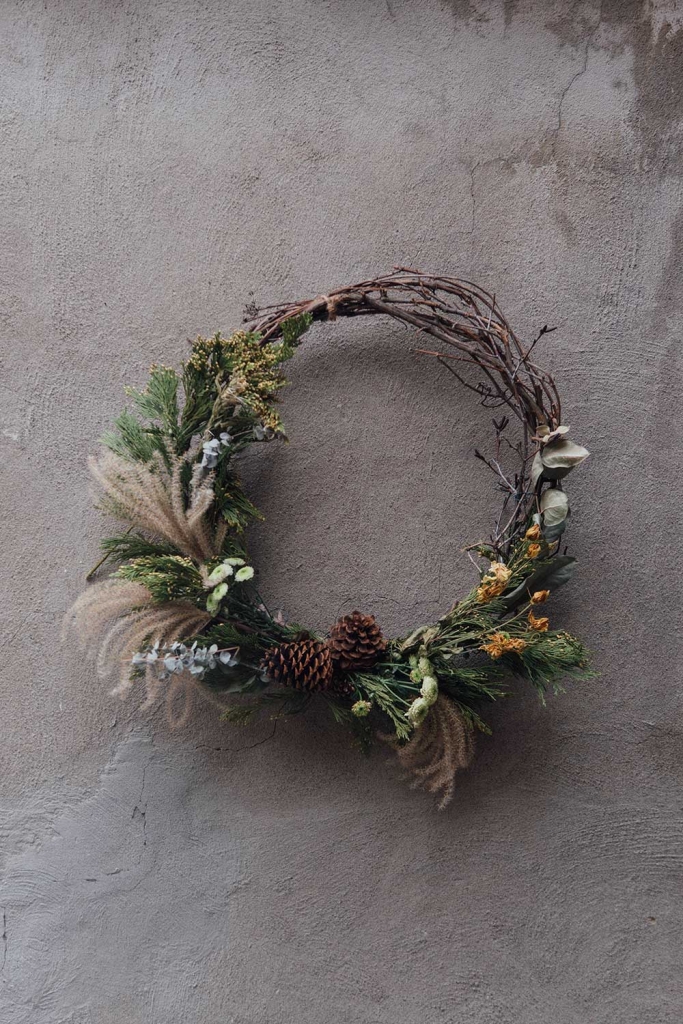
His favourite plant materials: Scotch pine, Jack pine, Eastern white cedar (Thuja), juniper, larch, blue spruce, birch twigs, oak leaves, grasses, club moss, and fluffy clematis seed heads — all responsibly harvested from nature or grown yourself.
Instructions
_____
- Assemble the base by tying the flexible branches or twigs together with the wire.
Shape them into a round, relatively solid circle by intertwining them. - Attach your first coniferous branch to the base, again using the wire, which you’ll wrap around the stem of the branch.
- Repeat this step until you’ve built up a lush layer of conifer branches.
Be sure to cover up the stems of the previous branches. You can choose to cover the whole base, or just half or a quarter. Using your pruning shears or scissors, cut back the branches to achieve the effect you’re after. Branches of about six to eight inches will give you a full-looking wreath. - Gradually add a variety of flowers, pine cones, or twigs. Some will be easy to insert into your wreath, while others will need to be fastened more securely. Be sure to add the most delicate pieces last.
Tip: A pair of tweezers may be useful for harder-to-reach openings in your wreath. - When attaching pieces to your wreath, favour natural materials (such as twine) or reusable materials (like wire or straight pins). You can use a hot glue gun to attach some pieces, but then you won’t be able to compost the plants later.
- Opt for clear fishing line, natural rope, or ribbon to hang your wreath.


Preservation
_____
How long will a natural wreath last? Marc Sardi explains that some conifers will stay fresh and green for 10 to 15 days without water, and your wreath can stay in perfect condition outdoors for several weeks if the temperature is below freezing. You can also extend the life of conifers by sticking them in moistened moss and sprinkling them with water regularly. “You can also directly spray the conifers with water, if you hang your wreath indoors, but that will only buy you a few days,” Sardi adds. Floral foam (also known as “Oasis”) is bad for the environment and your own health, so Sardi advises against it.